
Darth Dog's ROTJ Royal Guard WIP
-
Sascha_Wilsing

- Former DL
- Posts: 1401
- Joined: Tue Jan 22, 2013 2:48 pm
- TKID: 12112
- Location: Recklinghausen, Germany
Re: Darth Dog's ROTJ Royal Guard WIP
Congratulations!
Re: Darth Dog's ROTJ Royal Guard WIP
Costume approved by GML. Am now awaiting digits from 501st.
-
Sascha_Wilsing
- Former DL
- Posts: 1401
- Joined: Tue Jan 22, 2013 2:48 pm
- TKID: 12112
- Location: Recklinghausen, Germany
Re: Darth Dog's ROTJ Royal Guard WIP
Congratulations again. Didn't expect any troubles in getting approved. Welcome TR!
Re: Darth Dog's ROTJ Royal Guard WIP
My wife is very excited. I never would have guessed.
Re: Darth Dog's ROTJ Royal Guard WIP
Firstly, this build looks great and thank you for all the pictures. I am at the point in mine where I just need boots and to paint the helmet (a hearing amp and cooling system wouldn't hurt either from what you've said). I have a couple of questions since you are the most robust build thread at the moment:
1. What was the technique/materials you used to paint the helmet and how did you get the shine?
2. How did you color match the helmet paint color to the robe color? This is the part of mine I am most worried about.
1. What was the technique/materials you used to paint the helmet and how did you get the shine?
2. How did you color match the helmet paint color to the robe color? This is the part of mine I am most worried about.
Re: Darth Dog's ROTJ Royal Guard WIP
My GML let us know last night that my wife was awarded her digits. She is now an official member of the 501st. Thanks to everyone that assisted me.
Motoss, I used the ol' MK I eyeball to match the paint and am quite pleased with the results. I use automotive paints for a nice, durable finish. I painted the inside of the helmet with Dupli-Color flat black. The red is Dupli-Color Victory Red #BGM0519. I got mine at Advanced Auto and it will take 2 cans of red. The clear coat is the secret. It is 'USC Spray Max 2K' that I got on Amazon. It costs about $35 a can but is worth every penny. My helmet came primed so I didn't worry too much about that but if you need to just get the Dupli-Color sandable primer.
Hope this helps. If you need more advice let me know.
Re: Darth Dog's ROTJ Royal Guard WIP
This is my reply to a question on the Sith Lord site. Keep in mind we are talking about Vader's helmet that has 2 colors. As a Guard helmet only has one color it will be much easier. Hope this helps.
Your helmet is already painted? I would sand the clear down and get as smooth as possible. Then prime it with "sandable primer", sand to smooth and prime again. Continue to work on it until is is nice and smooth. I would then wet sand working from 400, 800, 1000, 1500 to 2000 grit sand paper. Before starting this be sure to wash your hands well to remove and skin oils. I usually wear exam gloves to keep the helmet clean.
After it is nice and smooth and dry I applied the black first. I did this because there is less black on the face mask and so it would require less masking before applying the gray. The first coat is just a light mist, you want to still be able to see primer through it. Allow 10 minutes and hit it again with another light coat. This one should almost cover all the primer. Keep the can 10" - 12" from the surface. I start the spray off the helmet and make a pass all the way across the helmet and off before releasing the nozzle. I move across fairly rapidly. Ten minutes after the second light coat I apply a "wet" coat. Having good lighting is very important. You must be able to see the surface well to ensure the paint does not start to sag. You want to surface to look wet and glossy. There is a fine line between the wet look and the paint starting to sag and run. You might want to get a can of cheap paint and just practice before starting your helmet. If your paint sags or runs you will need to let it dry for 24 hours and then sand the sag down smooth. If your wet coat goes on well then you need to wait 30 minutes and apply a second wet coat.
After this wait 24 hours and lightly wet sand with 800 grit just to rough the paint a bit. Let dry and mask off the the areas that will remain black. I used a 1/8" automotive paint masking tape to outline the black and then used the wider 1" blue masking tape to help cover. I cut newspaper to cover as much of the black paint as possible and tried to keep the area of paint with tape on it to a minimum. Don't want to peal the paint off with the tape.
Once taped off apply the gray using the same process as above. After 8 hours or so CAREFULLY remove the masking tape. Once it is removed again wet sand the mask to smooth the paint joint created by the gray paint and to also scuff the gray a little. Once it has dried you can apply the clear coat. I sprayed it on using the same process as the paint, 2 light coats and 2 wet. If you use the clear I used be sure to wear a mask as it has some nasty fumes. Allow the clear to dry 24 hours and you are set to go. After a couple of days you can apply some wax if you want.
One thing to be mindful of is to watch when you apply the primer and make sure there is not a reaction between the primer and the paint on your helmet. This could result in the paint having bubbles and pealing off. If the primer goes down okay then you should be fine.
One thing, once you activate that $35 can of clear coat it is only good for 18 hours. Make sure everything is ready. Also pic up some Dupli-Color surface cleaner. When you are ready to lay your first coat of paint take an old clean rag dampened with the cleaner and give the helmet a quick wipe down. This will clean off any oils or other things that may have gotten on the surface. After that touch only with gloves (exam type). Body oils might keep paint from sticking well.
Also I tried to keep my helmet as high as possible when painting. If you paint too close to the ground the pressure from the can will stir up dust that will land on your nice shiney paint job. I also paint with the garage door down because there is always that flying bug that wants to commit suicide on my fresh paint.
Re: Darth Dog's ROTJ Royal Guard WIP
Thanks for the advice!
Re: Darth Dog's ROTJ Royal Guard WIP
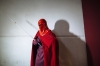
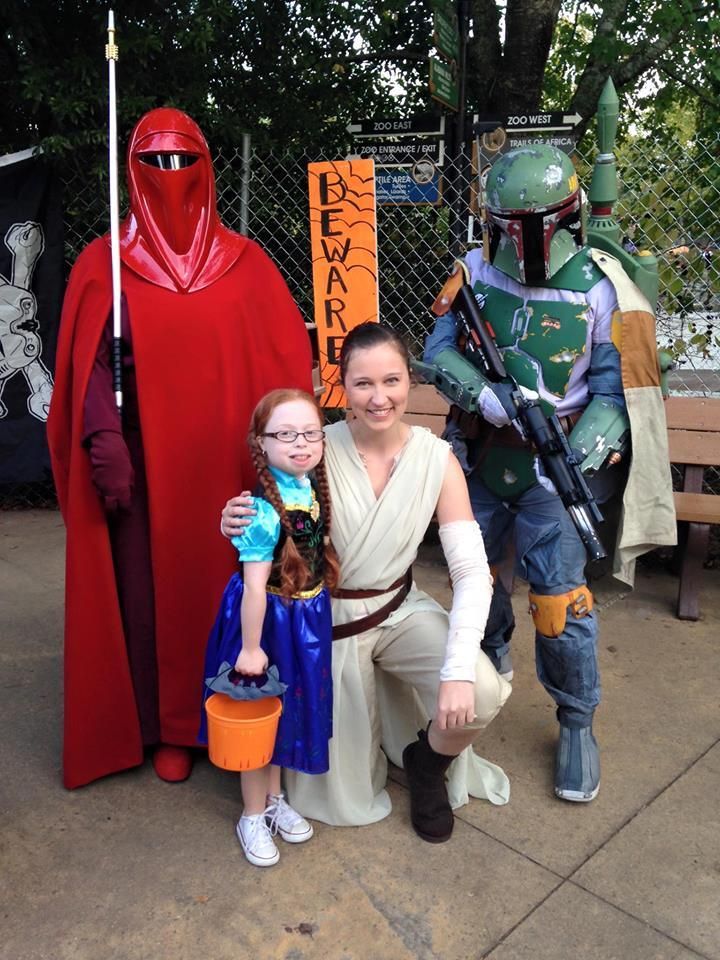
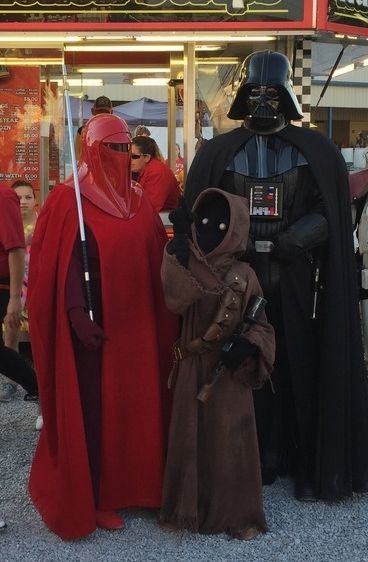
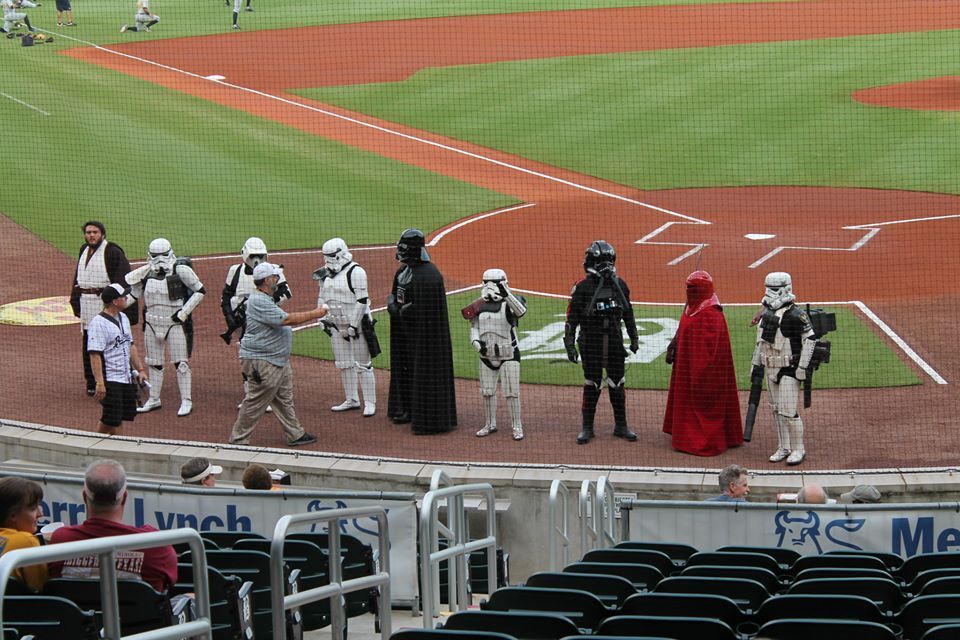
Wife has made several troops now. Adds some color to the otherwise black and white lineup.


Re: Darth Dog's ROTJ Royal Guard WIP
She looks awesome!! It is so much fun being a crayon isn't it?!?! Congrats!!