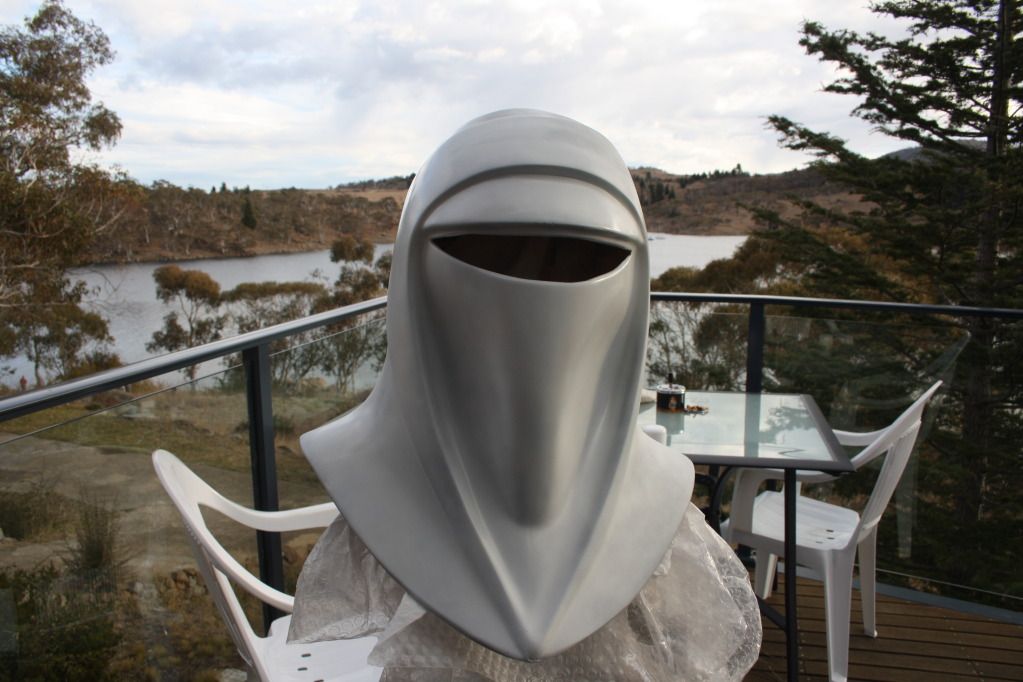
So I got my FP helm the other day and its fantastic, Auspost gave the box a bit of a work out and got a bit crushed, but the helm is fine apart from one little chip.
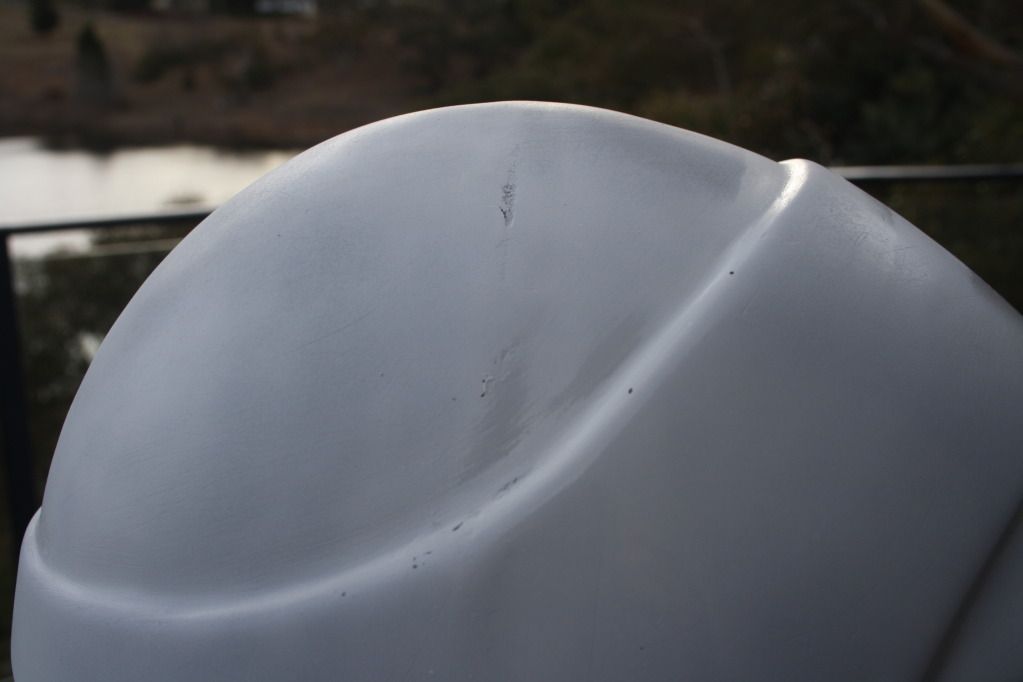
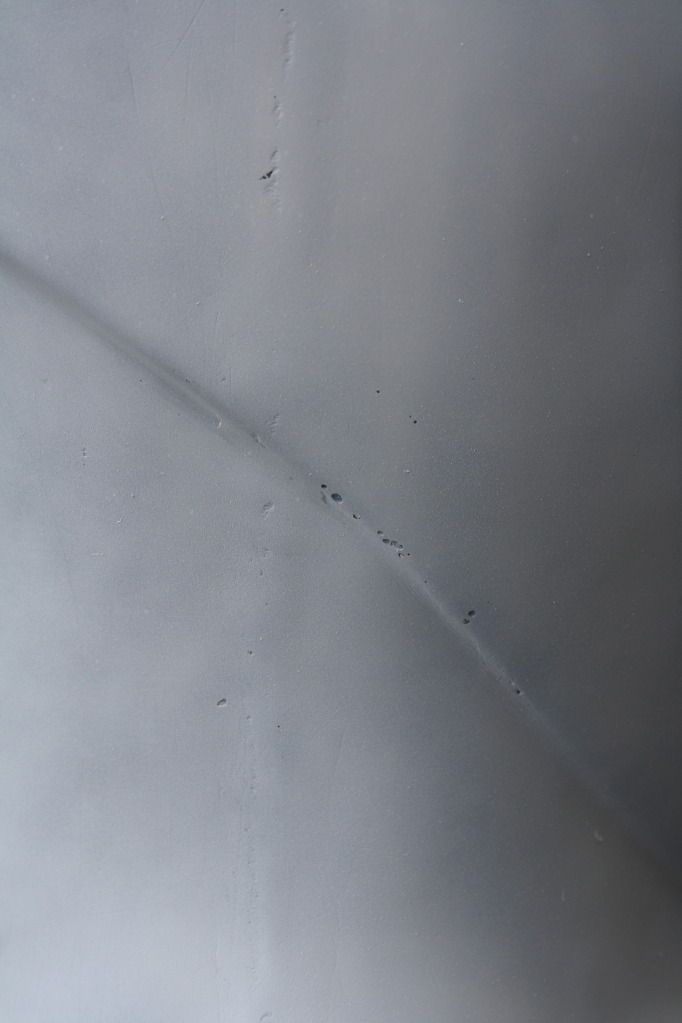
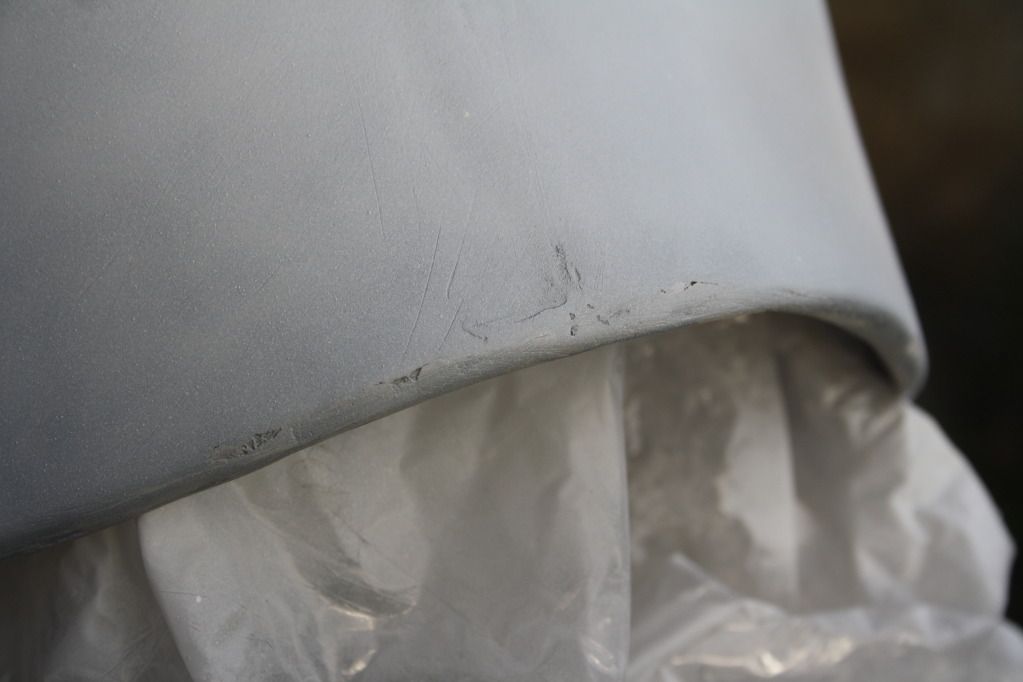
There are quite a few airbubble holes in the helm and I have no idea how to fix them I have sanded them so it has a nice very smooth finish but with these holes it will effect the painting. All so what would be the best way to get that nice smooth glossy finish? I have primed the helm with just some matte white but it feels gritty, I have tried sanding it with 1,200 wet/dry and that gives it a nice smooth finish but wears the paint down a bit. I dont really want to waste paint at $35 a can when it comes to the red.
Spot putty the air bubbles and sand smooth then re prime
Lucious Talvloinne TR-4126 (Stephen Davenport)
Costume Referencer 08-09 Detachment XO 09-10 Detachment CO 10-11 Detachment CO 11-12 Detachment XO 12-13 Detachment XO 13-14 Detachment X0 14-15 Detachment Mentor 15-17 Detachment CO 17-18
Owner of Carnor Jax - Captain Argyus - Revenge of the Sith Royal Guard - Force Unleashed Royal Guard
I had some similar imperfections and used spot putty. If I had to do it over now with what I've already got in my garage I'd use some Poly-Flex, basically a flexible bondo alternative which smooths down real easy. Once it's all sanded smooth I'd prime, wet-sand, prime again and then wet-sand and then paint.
As people have already said, you want to use spot putty on the tiny holes. Before you do that, I would also suggest that you first spray it with some filler primer to help fill the tiny hairline cracks that I can see in your picture. This will save you a lot of time, since you can then just put the spot putty over the holes versus the holes and the tiny cracks. Sand the spot putty areas smooth and hit the entire helmet again with primer. You shouldn't have to wet sand it after this last coat of primer, unless you goobed too much on. Spray a minmum of 2 coats of red paint letting it competely dry between coats and wet sanding. It should hopefully look really smooth before clear coating it. Best of luck.
bdgr wrote:As people have already said, you want to use spot putty on the tiny holes. Before you do that, I would also suggest that you first spray it with some filler primer to help fill the tiny hairline cracks that I can see in your picture. This will save you a lot of time, since you can then just put the spot putty over the holes versus the holes and the tiny cracks. Sand the spot putty areas smooth and hit the entire helmet again with primer. You shouldn't have to wet sand it after this last coat of primer, unless you goobed too much on. Spray a minmum of 2 coats of red paint letting it competely dry between coats and wet sanding. It should hopefully look really smooth before clear coating it. Best of luck.
I cant see any cracks but if there is any there is better to drill holes in each end of the crack to stop it from getting bigger.
Drill holes then cut the crack open the put plastic putty in it. Be shure to check that the putty works on that typ of plastic your Helmet is made of.
Why don't you knock it off with them negative waves?
Why don't you dig how beautiful it is out here?
Why don't you say something righteous and hopeful for a change?
Oddball - Kelly's Heroes
bdgr wrote:As people have already said, you want to use spot putty on the tiny holes. Before you do that, I would also suggest that you first spray it with some filler primer to help fill the tiny hairline cracks that I can see in your picture. This will save you a lot of time, since you can then just put the spot putty over the holes versus the holes and the tiny cracks. Sand the spot putty areas smooth and hit the entire helmet again with primer. You shouldn't have to wet sand it after this last coat of primer, unless you goobed too much on. Spray a minmum of 2 coats of red paint letting it competely dry between coats and wet sanding. It should hopefully look really smooth before clear coating it. Best of luck.
o.O I never knew the was such a thing as filler primer. I shall get some of that.
Also I'm having a hard time finding spot filler in Australia, does it go by a purticular name?
Deimos wrote:
o.O I never knew the was such a thing as filler primer. I shall get some of that.
Also I'm having a hard time finding spot filler in Australia, does it go by a purticular name?
Yep. I believe filler primer goes on thicker than regular primer and fills in more of the small scratches, grooves, and holes. Do a search on Amazon and you will see a bunch of choices.
In my experience, Filler Primer seems to dry really slow due to it's thicker nature. It seems to take a few days to cure, vs. normal primer. I would use a bit of spot glaze putty and your favorite primer.
I used automotive filler primer on my bucket and it helped but it wasn't a miracle in a can. I was able to wetsand within an hour or two if I remember correctly (always read the instructions of course).