Page 2 of 2
Re: Kanos build, step by step.
Posted: Fri Aug 30, 2013 7:27 pm
by stripes
Looks like you still need to cut out the visor area...
Re: Kanos build, step by step.
Posted: Fri Aug 30, 2013 9:36 pm
by raven6056
Re: Kanos build, step by step.
Posted: Fri Aug 30, 2013 9:53 pm
by JesterTDA
raven6056 wrote:
hrrrrrrm... any one got a spare dark smoked or two handy?
I've used a darkened grinding mask I got from a local auto-body shop (the insert, not the whole headgear to save money). Under $20
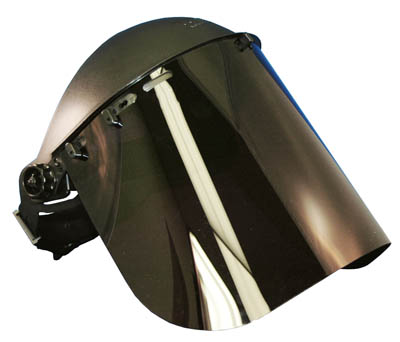
As well as a flexible motorcycle helmet snap-on face shield in smoked which I picked up at a local Honda motorcycle shop. Under $10 but smaller than the above mask

Both are pre-shaded so I didn't have to put darkener on them AND they're designed to flex. I also like the idea that my face mask can stop a rock

Re: Kanos build, step by step.
Posted: Fri Aug 30, 2013 10:10 pm
by stripes
JesterTDA wrote:raven6056 wrote:
hrrrrrrm... any one got a spare dark smoked or two handy?
I've used a darkened grinding mask I got from a local auto-body shop (the insert, not the whole headgear to save money). Under $20
As well as a flexible motorcycle helmet snap-on face shield in smoked which I picked up at a local Honda motorcycle shop. Under $10 but smaller than the above mask
Both are pre-shaded so I didn't have to put darkener on them AND they're designed to flex. I also like the idea that my face mask can stop a rock
You often have things thrown at you there Jester?

Re: Kanos build, step by step.
Posted: Fri Aug 30, 2013 10:11 pm
by stripes
No worries.... just making sure you hadn't missed that as it's bad enough looking through the small mail slot that we have
Re: Kanos build, step by step.
Posted: Sat Aug 31, 2013 4:31 am
by LuciousTalvloinne
When that Mohawk Kanos is done I need Front Back Side pics of it

Re: Kanos build, step by step.
Posted: Sat Aug 31, 2013 3:00 pm
by JesterTDA
stripes wrote:You often have things thrown at you there Jester?
Always be prepared!
Re: Kanos build, step by step.
Posted: Tue Sep 03, 2013 4:06 pm
by raven6056
Only from J's significant other when a new costume shows up in the home unannounced .....

... Which happens to me all the time.

Re: Kanos build, step by step.
Posted: Tue Sep 03, 2013 4:39 pm
by raven6056
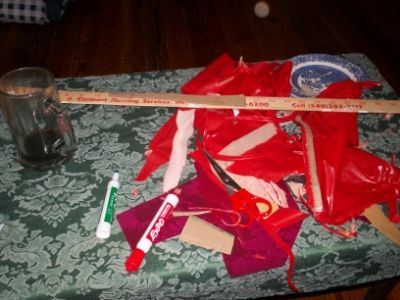
Ok... more work done over the holiday weekend:
For a start, I rummaged through my bits box to see what Belt Kit options might emerge... and Viola! (actually double bass, viola and Violin) .
Found an old B pull scout belt strip and a couple of stormy drop boxes... needless to say the buckle will have to be a scratch-build.
bit of trimming and a coat of red primer later:
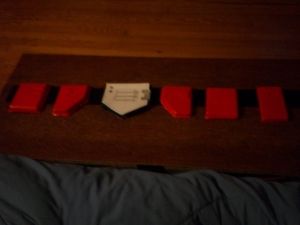
Im going to do a charity shop rummage later today to find a nice red or black leather belt.... always a fun way to spend a Tuesday.
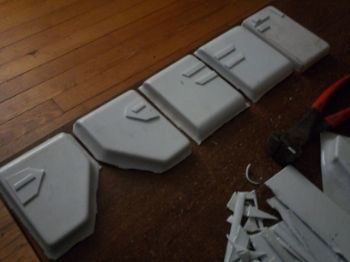
The Bracers have both moved on as well. Got both marked up in red pen to show spacing before I started playing with the most vile material known to model makers... three part epoxy resin.
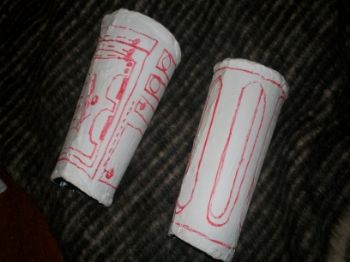
This I find vital. I used to make up resin armor semi professionally when I was back home in the UK for a LARP group called the Lorian Trust... The trick is to always have a visual ref to where your goop is going to be applied and in what thickness.
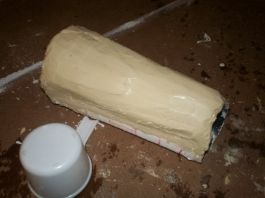
The weight factor Im not worried about... ought to be about 3-4 pounds imperial on the thicker one and 2-3 on the ribbed. I actually like HEAVY armor... gets me more in character when im wearing 30lbs + of hard armor rather then a suit of light cast PVC stormy gear . ( also its less likely to tear when a belligerent 5 year old smashes a hard plastic blaster into your ... "mid section" armor plate on a troop ... also these pieces may well end up as masters for a mold set... if the Garrisons Vac table ever gets working again!!!!
PS.. anyone got a Hasbro DH17 they would be willing to part with? cant get one locally and ebay seems bare of em! It will make Holster manufacture a lot easier!!!!
Re: Kanos build, step by step.
Posted: Wed Sep 04, 2013 6:21 pm
by raven6056
Update time again... (Im on a roll)

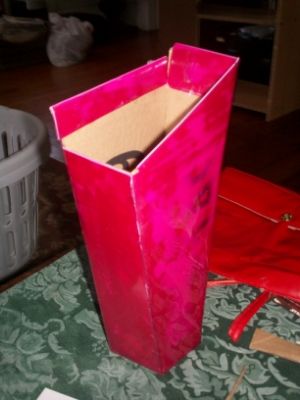
Found a nice template of a DH17 in my bits box... thus Holster construction can get moving. This will be a two part build. The lower "Bucket" part of the holster first and then the Belt attachment rig with holster flap once that's done.
A sure sign of costume work underway... wife noted table within 3 seconds... noted lawn un-mowed as she walked into house.... ooooooops :doh:
My method is simple for ridged "Hard Holsters".... Draw out templates of the sides/Front/Rear/Base, cut plasti-card to shape with tabs to fold over (like those paper house cut out kits we made as kids) then set with glue. Once dry set cardboard plates inside for greater strength. and set with a hard resin based glue. Wait to dry before covering.
I raided three of the local Thrift Shops... found a ladies handbag of red Stretchy Leatherette and proceeded to cut it to pieces.
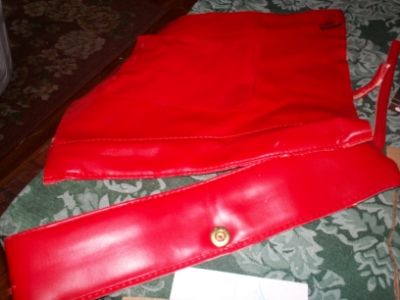
nice seams and just the right shade! I use rivets on the rear to secure the leather before stretching and gluing the rest... a last rivet secures the wrapping.
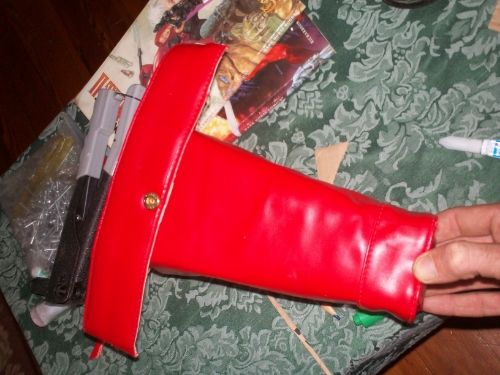
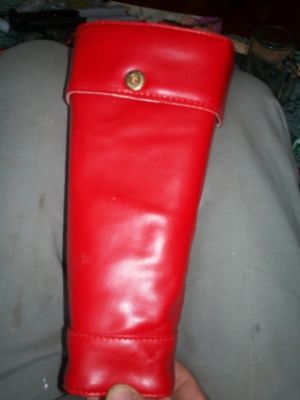
And there we go.
One holster mostly done for the epic cost of ....
$8.
... and $6 of that was spent on glue.
tomorrow we ought to be able to see part two complete and the fully assembled holster rig ready for mounting.


