Pben' s Shadow Guard TFU WIP
-
LuciousTalvloinne

- Former DL
- Posts: 2243
- Joined: Mon Sep 08, 2008 4:38 am
- TKID: 4126
- Location: Star Garrison
- Contact:
Re: Pben' s Royal Guard TFU WIP
Slow and steady. What grade of of sanding do you plan on using?
Lucious Talvloinne TR-4126 (Stephen Davenport)
Costume Referencer 08-09 Detachment XO 09-10 Detachment CO 10-11 Detachment CO 11-12 Detachment XO 12-13 Detachment XO 13-14 Detachment X0 14-15 Detachment Mentor 15-17 Detachment CO 17-18
Owner of Carnor Jax - Captain Argyus - Revenge of the Sith Royal Guard - Force Unleashed Royal Guard
Costume Referencer 08-09 Detachment XO 09-10 Detachment CO 10-11 Detachment CO 11-12 Detachment XO 12-13 Detachment XO 13-14 Detachment X0 14-15 Detachment Mentor 15-17 Detachment CO 17-18
Owner of Carnor Jax - Captain Argyus - Revenge of the Sith Royal Guard - Force Unleashed Royal Guard
Re: Pben' s Royal Guard TFU WIP
I've bought 180 but I'm affraid that will need a bigger number...Am I right?LuciousTalvloinne wrote:Slow and steady. What grade of of sanding do you plan on using?
-
Sascha_Wilsing

- Former DL
- Posts: 1401
- Joined: Tue Jan 22, 2013 2:48 pm
- TKID: 12112
- Location: Recklinghausen, Germany
Re: Pben' s Royal Guard TFU WIP
The bigger the number the smaller the scratches.
It is better to get a finer finish.
It is better to get a finer finish.
Re: Pben' s Royal Guard TFU WIP
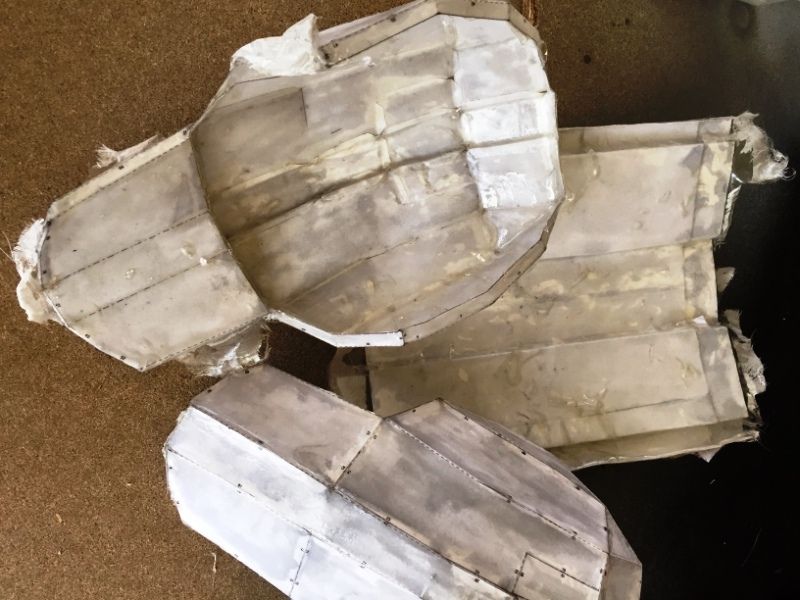
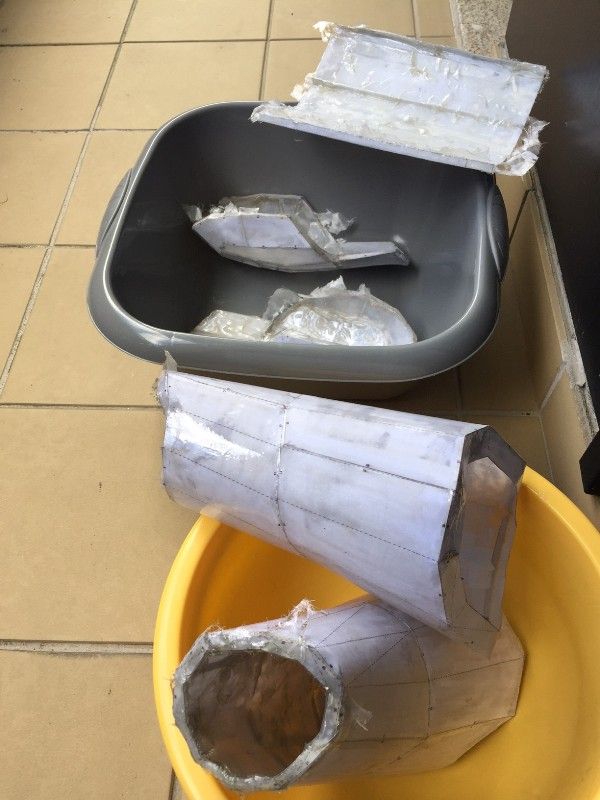
Another round of fiberglass done and armor pieces put to cure. My fiberglass cloth is very strong but too thin to move after I lay it down on the resined surface. As to say some air bubbles appeared but I've already managed to do some incisions and tomorrow will load the gaps with more resin. I may do another coat of fiberglass cloth in some areas that I want really strong. Each pice of armor has 2 layers of resin inside and outside and the insides will have one or two fiberglass layers. After I'm happy with the results I'll start working with the automotive putty and sand paper.


Last edited by pben on Mon Apr 11, 2016 11:57 am, edited 1 time in total.
Re: Pben' s Royal Guard TFU WIP
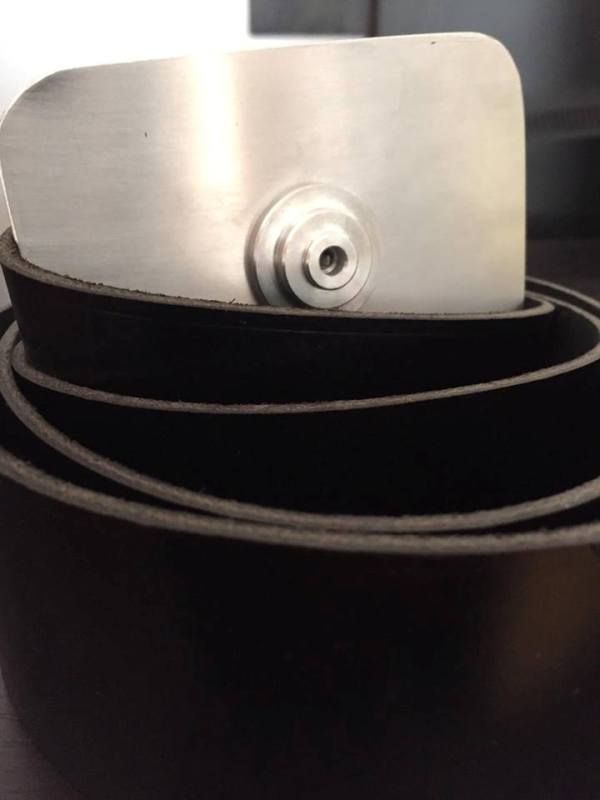
Belt arrived from SBR Props. Very, very happy! Great job from my Spanish friends.

Last edited by pben on Mon Apr 11, 2016 12:03 pm, edited 1 time in total.
-
Sascha_Wilsing
- Former DL
- Posts: 1401
- Joined: Tue Jan 22, 2013 2:48 pm
- TKID: 12112
- Location: Recklinghausen, Germany
Re: Pben' s Royal Guard TFU WIP
Realy nice.
Good to see you are getting all things together.
Good to see you are getting all things together.
Re: Pben' s Royal Guard TFU WIP
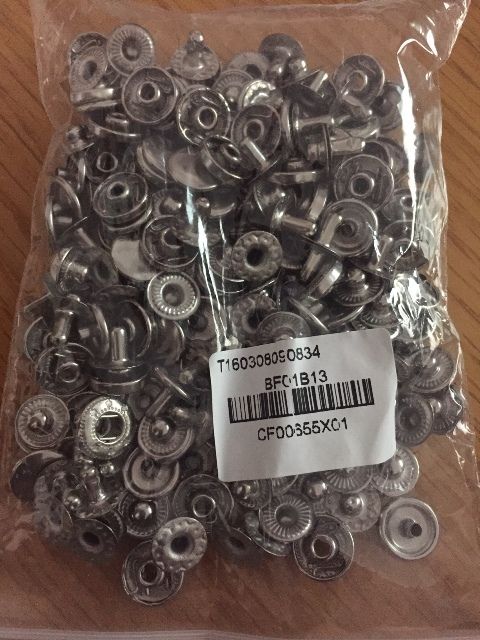
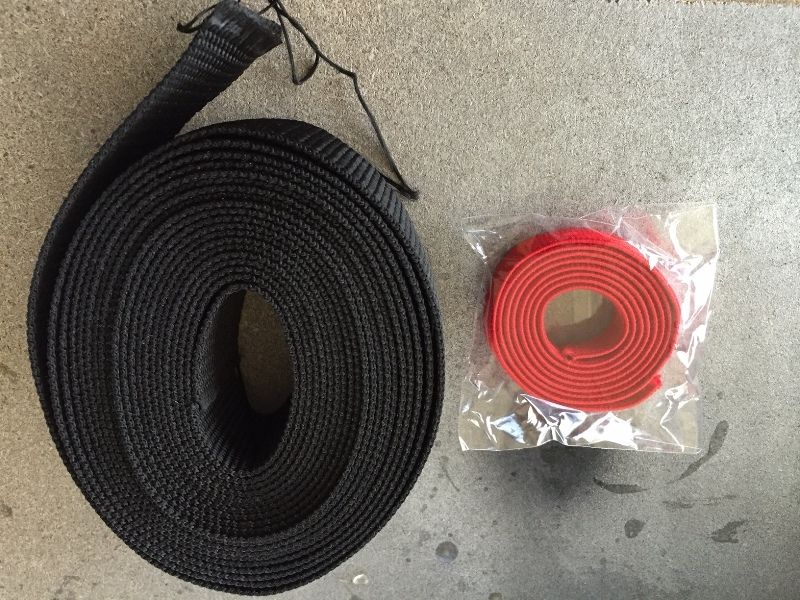
Getting all the stuff needed: 10mm Snap buttons, polypropylene webbing to connect back, chest and ab plate and 15mm red elastic band to secure the chins.


Last edited by pben on Mon Apr 11, 2016 12:04 pm, edited 1 time in total.
Re: Pben' s Royal Guard TFU WIP
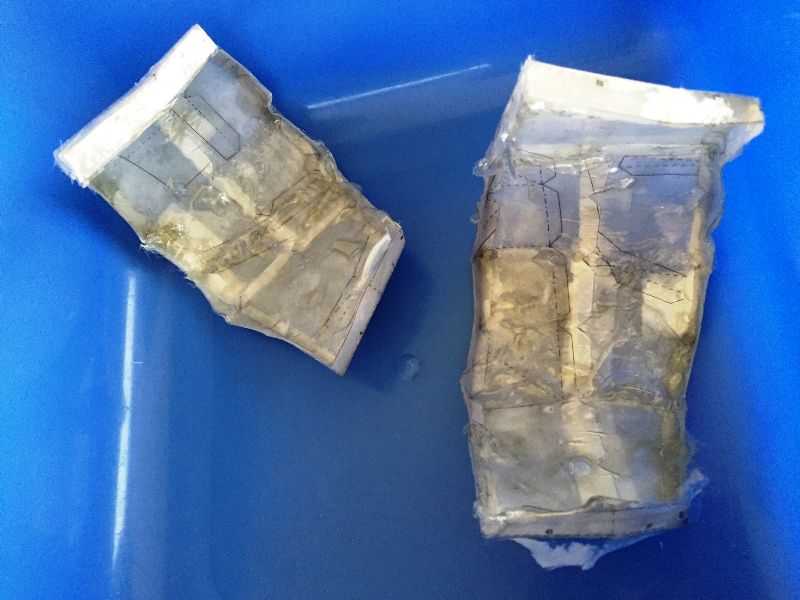
I've also made another layer of resin and fiberglass to these armor parts which I felt would need more toughness:

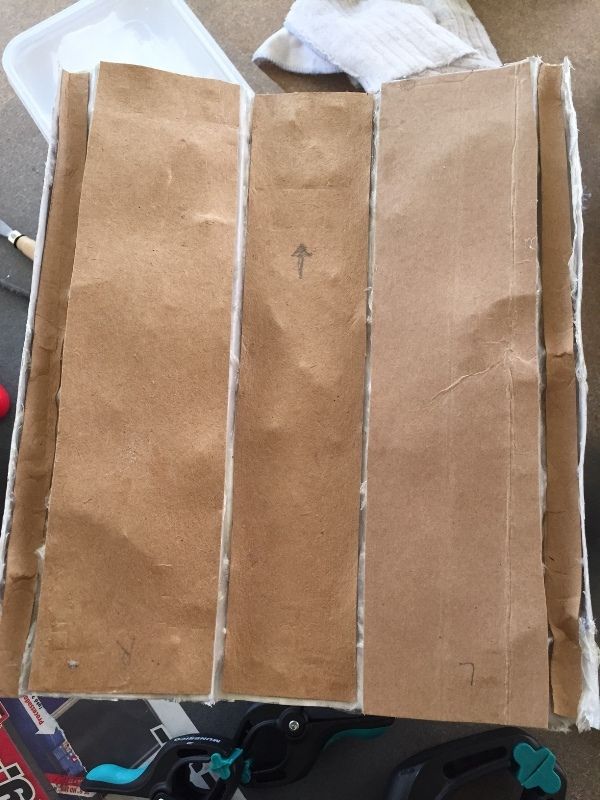
The ab plate was covered by cardboard on top of two layers of resin and two of fiberglass and then I applied another coat of resin.

The ab plate was covered by cardboard on top of two layers of resin and two of fiberglass and then I applied another coat of resin.

Re: Pben' s Royal Guard TFU WIP
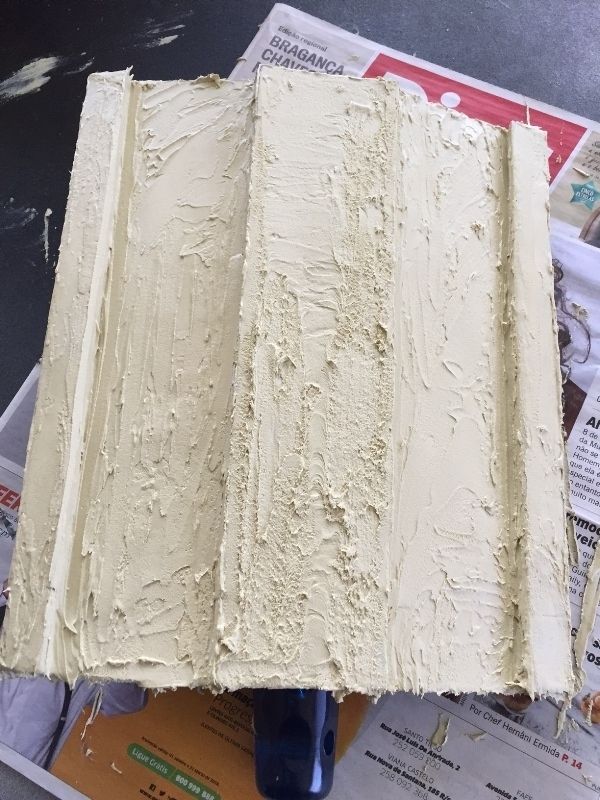
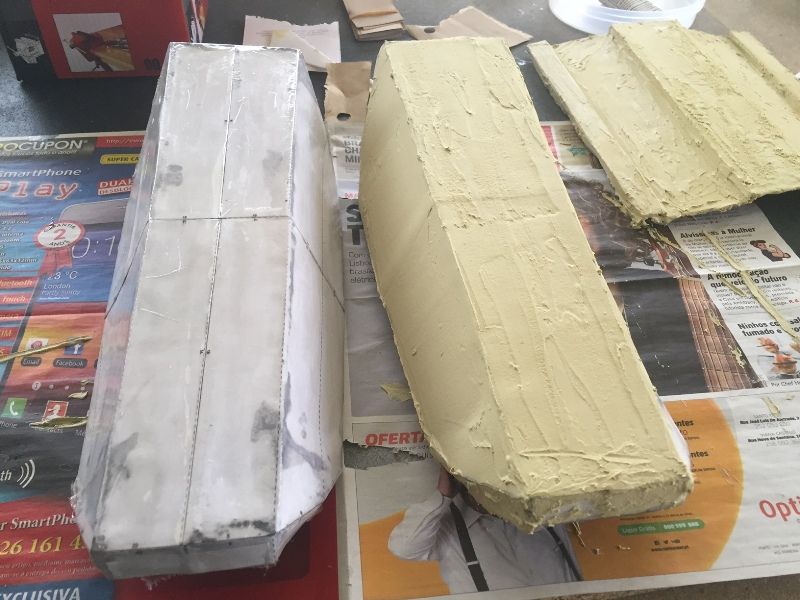
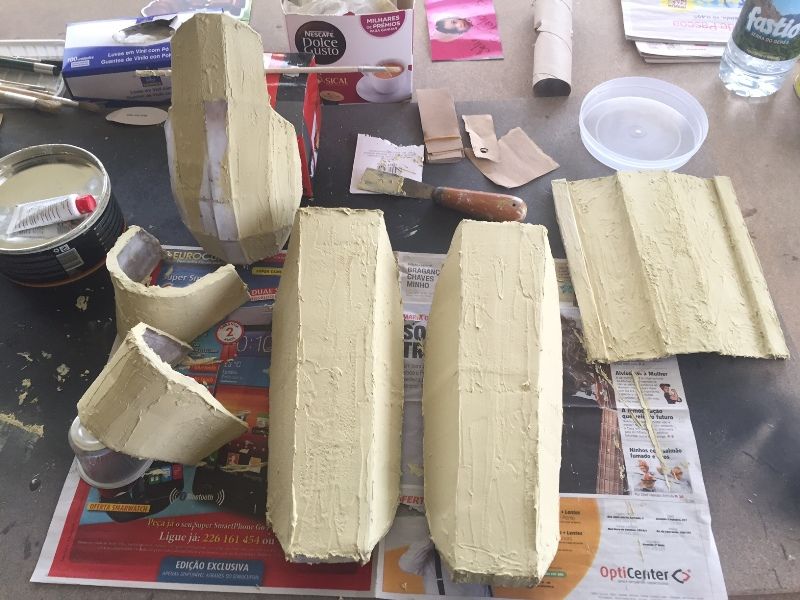
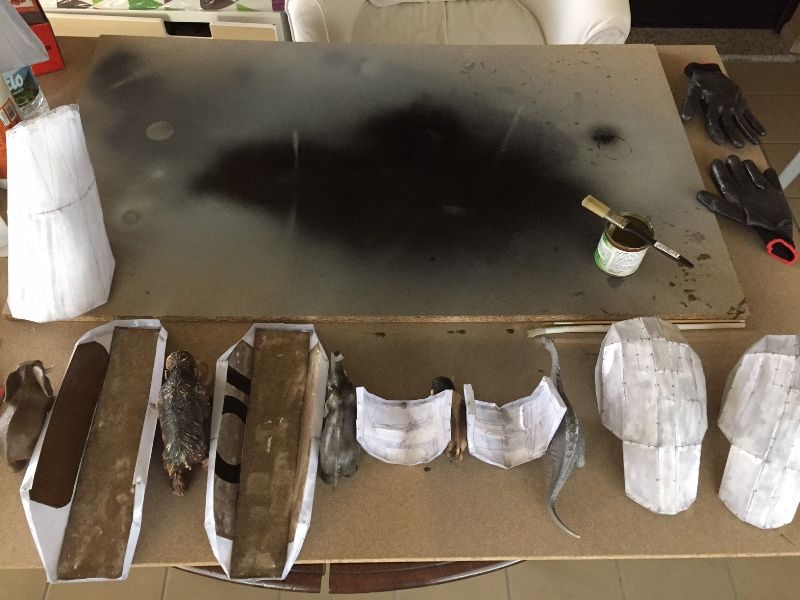
Ok enough of resin and fiberglass. Time to apply putty!
Re: Pben' s Royal Guard TFU WIP
Putty works in progress. A couple of issues I've learned. It's easier than I thought but I will have a lot of sanding ahead in the ab plate because I kept putty thicker than needed for the first layer... Other issue is that I may have some trouble to round up the shoulders armor... I should have not folded the initial pepakura shoulder bells to keep it round, as I did to the forearm pieces when I realized that folding will bring a lot of work to make the final right shape. Let's see what I can do...