Page 1 of 2
Getting the perfect finish
Posted: Tue Aug 28, 2012 4:57 am
by Deimos
Re: Getting the perfect finish
Posted: Tue Aug 28, 2012 5:20 am
by LuciousTalvloinne
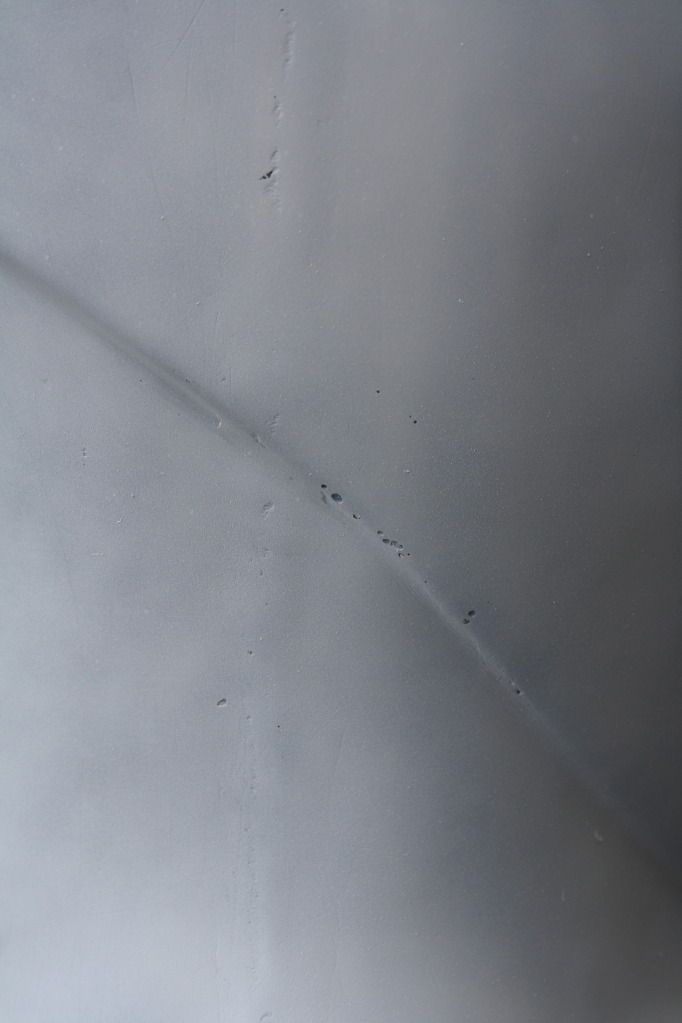
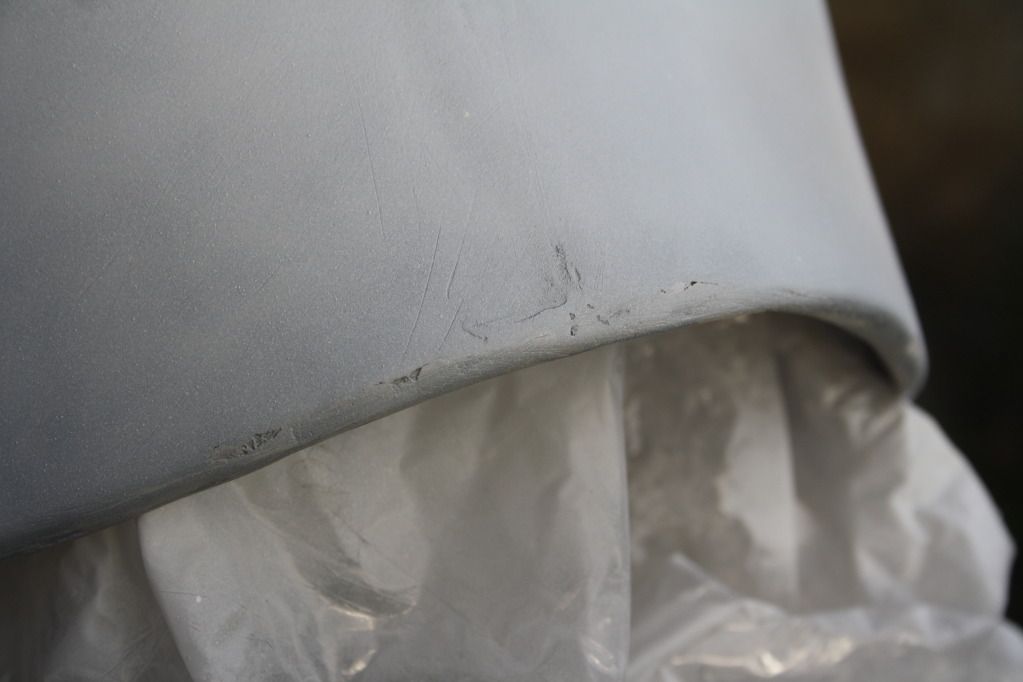
Spot putty the air bubbles and sand smooth then re prime
Re: Getting the perfect finish
Posted: Tue Aug 28, 2012 2:18 pm
by JesterTDA
I had some similar imperfections and used spot putty. If I had to do it over now with what I've already got in my garage I'd use some Poly-Flex, basically a flexible bondo alternative which smooths down real easy. Once it's all sanded smooth I'd prime, wet-sand, prime again and then wet-sand and then paint.
Best of luck!
Re: Getting the perfect finish
Posted: Wed Aug 29, 2012 12:52 am
by bdgr
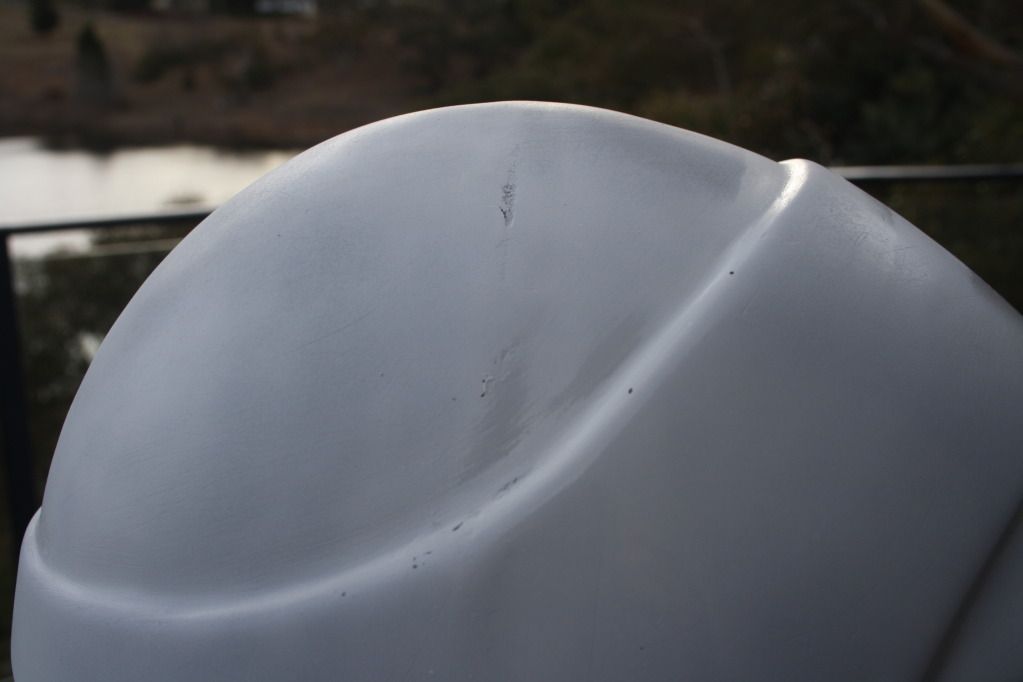
As people have already said, you want to use spot putty on the tiny holes. Before you do that, I would also suggest that you first spray it with some filler primer to help fill the tiny hairline cracks that I can see in your picture. This will save you a lot of time, since you can then just put the spot putty over the holes versus the holes and the tiny cracks. Sand the spot putty areas smooth and hit the entire helmet again with primer. You shouldn't have to wet sand it after this last coat of primer, unless you goobed too much on. Spray a minmum of 2 coats of red paint letting it competely dry between coats and wet sanding. It should hopefully look really smooth before clear coating it. Best of luck.
Re: Getting the perfect finish
Posted: Wed Aug 29, 2012 5:37 pm
by Danielandre77
bdgr wrote:As people have already said, you want to use spot putty on the tiny holes. Before you do that, I would also suggest that you first spray it with some filler primer to help fill the tiny hairline cracks that I can see in your picture. This will save you a lot of time, since you can then just put the spot putty over the holes versus the holes and the tiny cracks. Sand the spot putty areas smooth and hit the entire helmet again with primer. You shouldn't have to wet sand it after this last coat of primer, unless you goobed too much on. Spray a minmum of 2 coats of red paint letting it competely dry between coats and wet sanding. It should hopefully look really smooth before clear coating it. Best of luck.
I cant see any cracks but if there is any there is better to drill holes in each end of the crack to stop it from getting bigger.
Drill holes then cut the crack open the put plastic putty in it. Be shure to check that the putty works on that typ of plastic your Helmet is made of.
Re: Getting the perfect finish
Posted: Mon Sep 03, 2012 1:43 am
by Deimos
bdgr wrote:As people have already said, you want to use spot putty on the tiny holes. Before you do that, I would also suggest that you first spray it with some filler primer to help fill the tiny hairline cracks that I can see in your picture. This will save you a lot of time, since you can then just put the spot putty over the holes versus the holes and the tiny cracks. Sand the spot putty areas smooth and hit the entire helmet again with primer. You shouldn't have to wet sand it after this last coat of primer, unless you goobed too much on. Spray a minmum of 2 coats of red paint letting it competely dry between coats and wet sanding. It should hopefully look really smooth before clear coating it. Best of luck.
o.O I never knew the was such a thing as filler primer. I shall get some of that.
Also I'm having a hard time finding spot filler in Australia, does it go by a purticular name?
Re: Getting the perfect finish
Posted: Tue Sep 04, 2012 9:29 pm
by JesterTDA
Not sure what it would be called Down Under but here is an Amazon link, it might point you in the right direction.
Bondo Glazing and Spot Putty
It also wouldn't hurt to go to a body shop and show them a print out, ask what they use.
Re: Getting the perfect finish
Posted: Tue Sep 04, 2012 11:06 pm
by bdgr
Deimos wrote:
o.O I never knew the was such a thing as filler primer. I shall get some of that.
Also I'm having a hard time finding spot filler in Australia, does it go by a purticular name?
Yep. I believe filler primer goes on thicker than regular primer and fills in more of the small scratches, grooves, and holes. Do a search on Amazon and you will see a bunch of choices.
Re: Getting the perfect finish
Posted: Wed Sep 05, 2012 3:55 am
by the dark knight
bdgr wrote:Deimos wrote:
o.O I never knew the was such a thing as filler primer. I shall get some of that.
Also I'm having a hard time finding spot filler in Australia, does it go by a purticular name?
Yep. I believe filler primer goes on thicker than regular primer and fills in more of the small scratches, grooves, and holes. Do a search on Amazon and you will see a bunch of choices.
In my experience, Filler Primer seems to dry really slow due to it's thicker nature. It seems to take a few days to cure, vs. normal primer. I would use a bit of spot glaze putty and your favorite primer.
Re: Getting the perfect finish
Posted: Wed Sep 05, 2012 7:01 pm
by JesterTDA
I used automotive filler primer on my bucket and it helped but it wasn't a miracle in a can. I was able to wetsand within an hour or two if I remember correctly (always read the instructions of course).