Page 3 of 5
Re: RaiderNick's RG WIP
Posted: Sat May 18, 2013 9:14 pm
by RaiderNick
Ok so it has been an eternity since I did any work on this because I've been waiting for my boots. I've given up hope that I'm ever going to get them so I bought alternatives from one of the other threads on the boards here.
Now that I have the boots everything else is done except the paint on the helmet which I'm working on right now. I hope to have it done by mid-late june as I have a lot of important troops around that time I'd like to use this for.
Re: RaiderNick's RG WIP
Posted: Sat May 18, 2013 9:17 pm
by RaiderNick
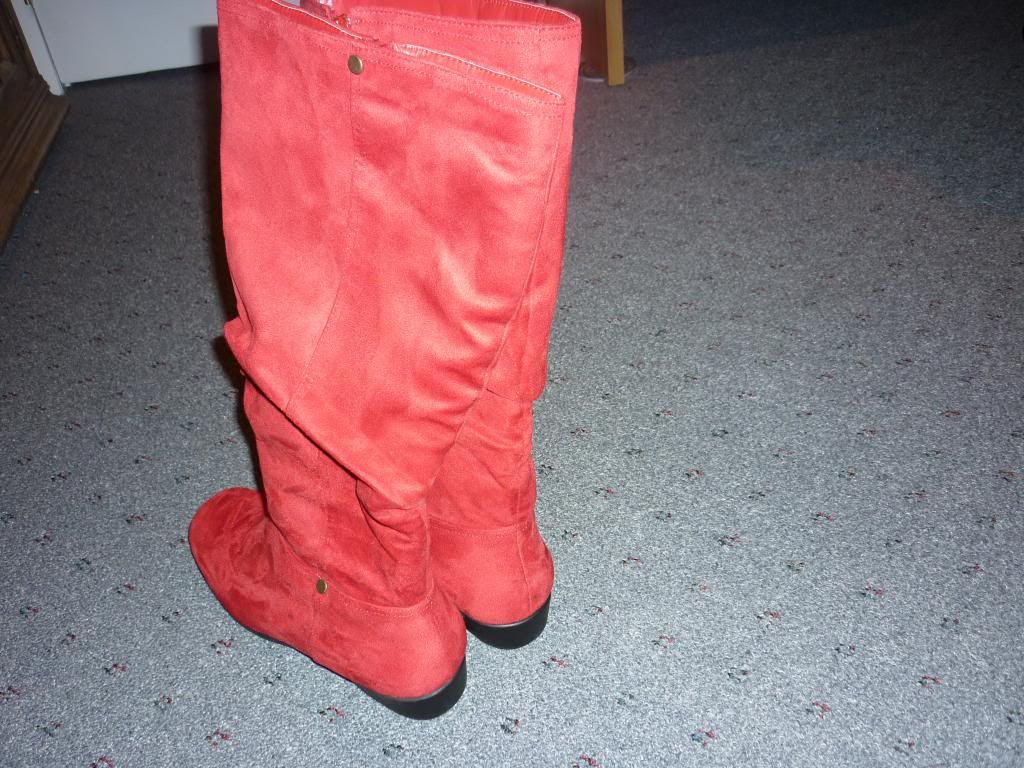
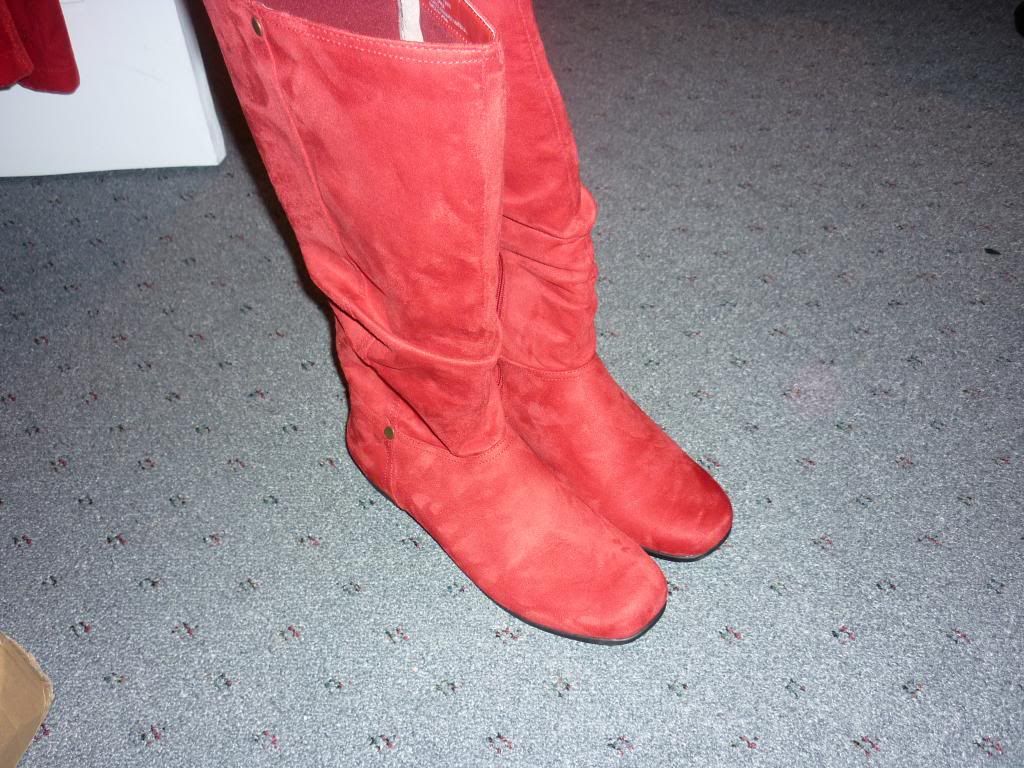
Also, these boots are shorter than I expected when getting the outer robe made(I was expecting to have the "other" boots) so it is too long. Is there a way to properly hem velvet without crushing and ruining it?
I may even want to temporarily hem it just in case the other boots do ever show up.
Re: RaiderNick's RG WIP
Posted: Sun May 19, 2013 12:01 am
by bdgr
RaiderNick wrote:Also, these boots are shorter than I expected when getting the outer robe made(I was expecting to have the "other" boots) so it is too long. Is there a way to properly hem velvet without crushing and ruining it?
I may even want to temporarily hem it just in case the other boots do ever show up.
Another easier option might be to put Dr. Schools shoe inserts into those boots to make you slightly taller so that your outer robe is at the correct length. They will also make your feet feel better during long troops

Or adding a little padding on your shoulders to help raise your outer robe.
Are you planning on "coloring" the metal buttons on your boots, so that they are not noticeable?
Re: RaiderNick's RG WIP
Posted: Sun May 19, 2013 3:08 am
by RaiderNick
I already have inserts in the boots and my feet barely fit inside with those so I can't add any more. I also tried shoulder pads the robe is still too long. The "other boots" were supposed to have 2 inch lifts in them these have no room for lifts. I think the robe was just too long to start with even with all that it is still about 3 inches too long, not something that can be remedied without hemming it.
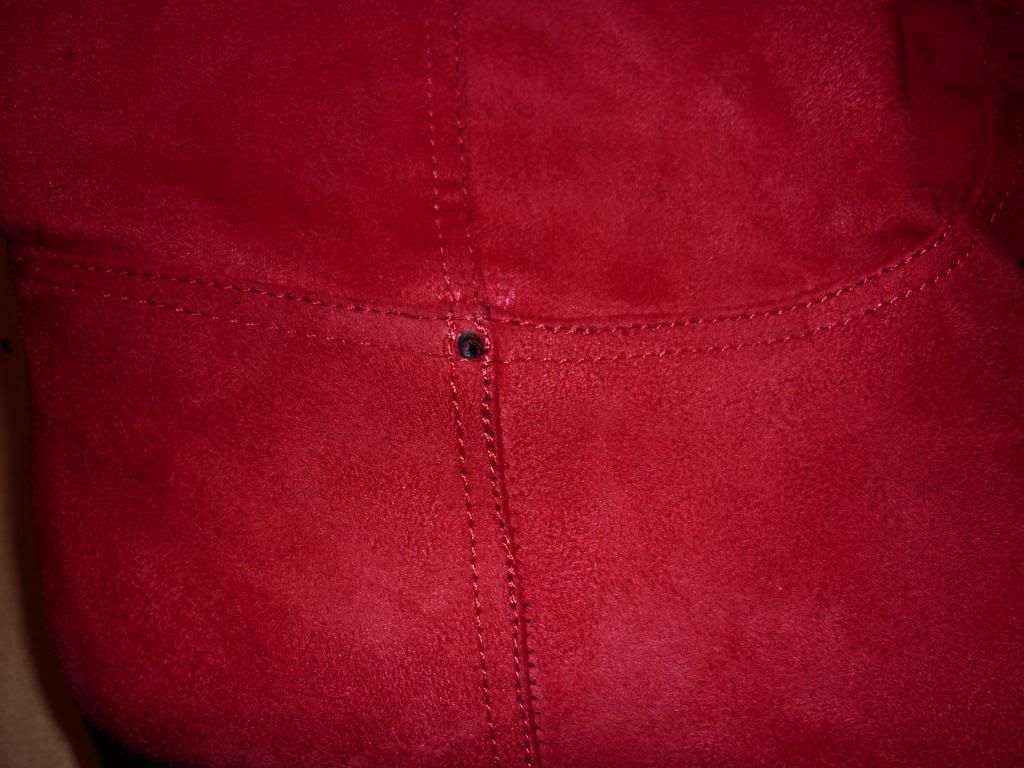
I popped the buttons out and they left these nice little holes in the boots. They are a lot less noticeable than the buttons but there's not much I can do to cover them.
Re: RaiderNick's RG WIP
Posted: Sun May 19, 2013 10:17 am
by Sascha_Wilsing
search for for a car paint scratch repair stick in the color of the boots and paint them. Then they will be nearly invisible

Re: RaiderNick's RG WIP
Posted: Tue May 21, 2013 4:16 am
by RaiderNick
Sooo, found out that now my FP bucket is unusable. This is another big middle finger to me in this build. Apparently when it was made, it was rushed and the fiberglass got airbubbles in it. You couldn't see these in my earlier photos because of the rough sanding they did on it. Once i wet sanded it up to 1000 grit THOUSANDS of pin holes appeared on the bucket. They are heavily concentrated on the top and the seam along the sides. There are also hundreds more not in these areas.
When the body shop saw this they refused to touch it because of the man hours required to fix it, it wasn't cost effective for them. Simple bondo won't fix this problem and when I showed it to a friend who does this sort of work he feels it is not fixable either. So another major setback now I had to buy a new bucket from MLC. I talked to MLC first and they guarantee it comes in ready to paint condition, sanded and primed. So now with a much lighter wallet, I play the waiting game yet again...
Re: RaiderNick's RG WIP
Posted: Tue May 21, 2013 5:21 am
by Squirrel
RaiderNick wrote:Sooo, found out that now my FP bucket is not usable. This is another big middle finger to me in this build. Apparently when it was made, it was rushed and the fiberglass got airbubbles in it. You couldn't see these in my earlier photos because of the rough sanding they did on it. Once i wet sanded it up to 1000 grit THOUSANDS of pin holes appeared in the bucket. They are heavily concentrated on the top and the seam along the sides. There are also hundreds more not in these areas.
When the body shop saw this they refused to touch it because of the man hours required to fix it, it wasn't cost effective for them. Simple bondo won't fix this problem and when I showed it to a friend who does this sort of work he feels it is not fixable either. So another major setback now I had to buy a new bucket from MLC. I talked to MLC first and they guarantee it comes in ready to paint condition, sanded and primed. So now with a much lighter wallet, I play the waiting game yet again...
Sad to hear it. Have you considered doing a layer of Rondo (resin/bondo mix) to try to fill the pin-holes?
Re: RaiderNick's RG WIP
Posted: Tue May 21, 2013 6:16 am
by exar
I would recommend taking it to either a local EAA chapter meeting or possibly a hobby shop that does work on remote control aircraft. The eaa guys really know there stuff about fixing fiberglass with something lightweight and strong. Since they use the same stuff on their aircraft,
Re: RaiderNick's RG WIP
Posted: Tue May 21, 2013 6:51 am
by Venom13
For the pin holes as well I put 6 coats of red and 3 coats of primer on my bucket I would think with this much paint and not to mention the 5 coats of clear the pin holes would be gone
Re: RaiderNick's RG WIP
Posted: Tue May 21, 2013 7:50 am
by RaiderNick
Some of the pin holes go all the way through the bucket, so simply priming and painting it multiple times won't fix it. I will try the other suggestions though at this point this bucket is just a backup and if I do manage to fix it I'm going going to sell it to recoup my losses.