Page 2 of 4
Re: TFU Royal Guard from Oz
Posted: Thu Oct 03, 2019 1:27 pm
by Sith Lord
Talmor wrote:Looking good so far! Do let us know what color red you go with!

Thanks. As with the primer, I'm going for the local store (Supacheap Auto) Red acrylic spray cans.
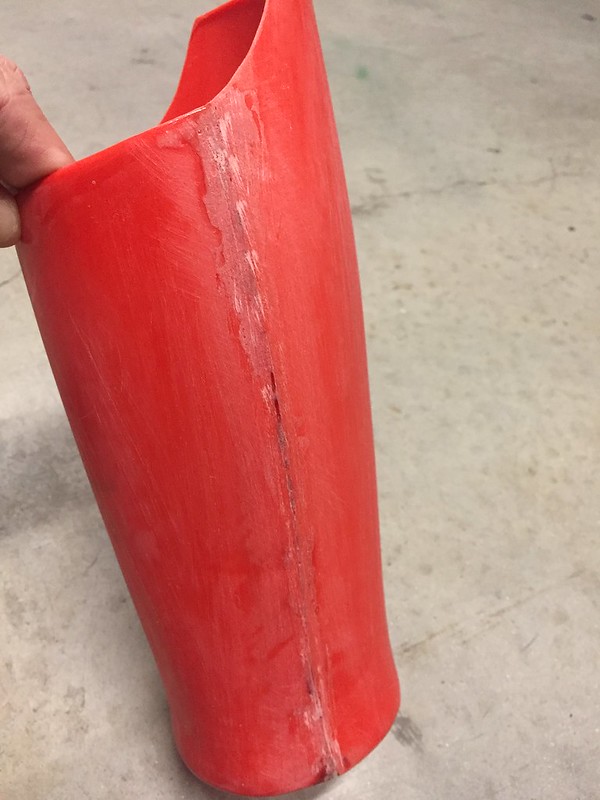
Forearms are the same as the helmet - 2 halves that need to be seamlessly joined.
Start
 Untitled
 by
Ian Naden, on FlickrUntitled by Ian Naden, on Flickr
 Untitled
 by
Ian Naden, on Flickr
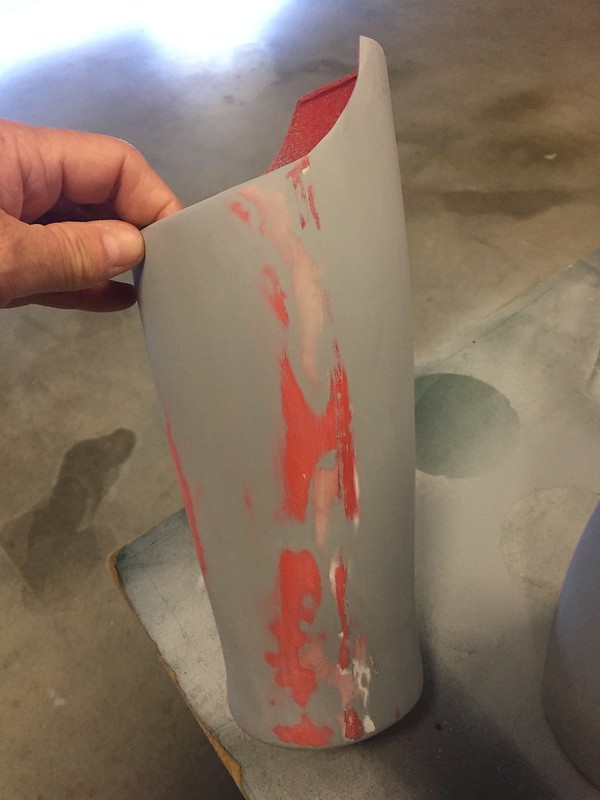
Finish
 Untitled
 by
Ian Naden, on Flickr
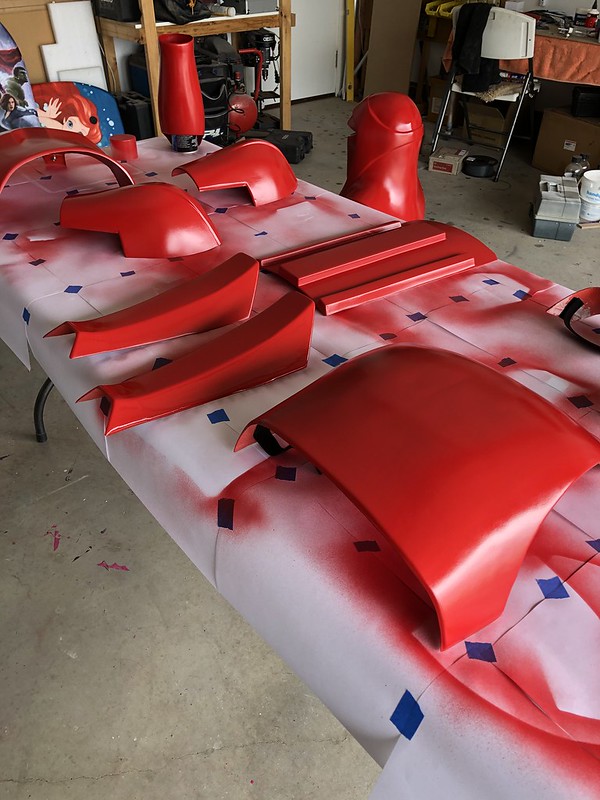
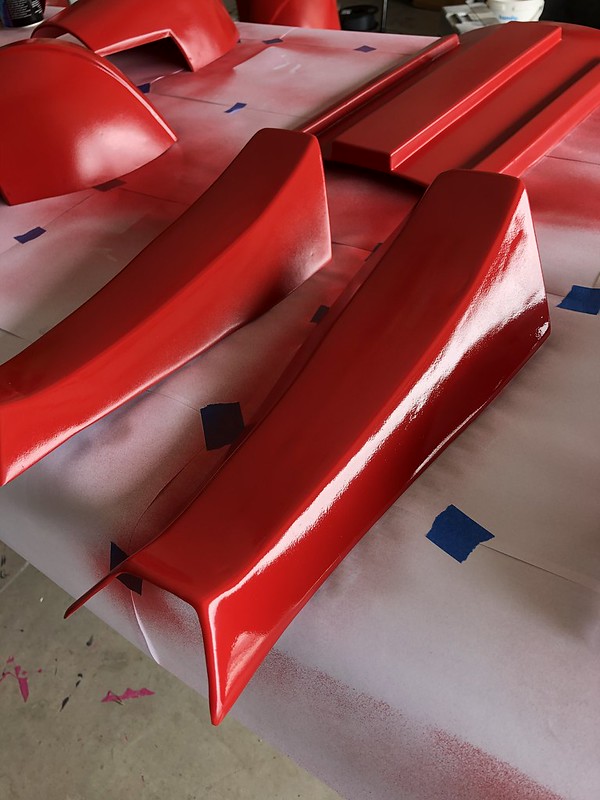
I've painted everything with 3 coats, but will now work on the strapping and stuff before I give it the final coat and then clear coats. I figured I'll possibly knock it around a bit in the garage, so best chipping the new paint if I can.
 Untitled
 by
Ian Naden, on FlickrUntitled by Ian Naden, on Flickr
And sewed some stirrups onto my undersuit to stop the legs riding up and bunching around the knees
 Untitled
 by
Ian Naden, on Flickr
Officer boots
 Untitled
 by
Ian Naden, on Flickr
 Untitled
 by
Ian Naden, on Flickr
Re: TFU Royal Guard from Oz
Posted: Fri Oct 04, 2019 5:57 am
by Gree23
Looking good! keep up the good work. Going to get started on my trimming tomorrow
Re: TFU Royal Guard from Oz
Posted: Mon Oct 07, 2019 12:06 pm
by Sith Lord
Thanks mate.
Belt - I picked up a belt from a local supplier. Although great, I was not happy the way it folded over the buckle causing a large double thickness section. Also, technically, the Royal Guard doesn't have a rivet, although they are often approved with one.
 Untitled
 by
Ian Naden, on Flickr
So, dismantled.
 Untitled
 by
Ian Naden, on Flickr
Cut off the before the fold, and used the the rivet hole as the hole through the two pieces of steel. Added a bit more glue this time too.
 Untitled
 by
Ian Naden, on Flickr
 Untitled
 by
Ian Naden, on Flickr
And no rivet

Should fit a bit better around my waist against the hard armour.
 Untitled
 by
Ian Naden, on Flickr
Re: TFU Royal Guard from Oz
Posted: Tue Oct 08, 2019 1:28 am
by Sith Lord
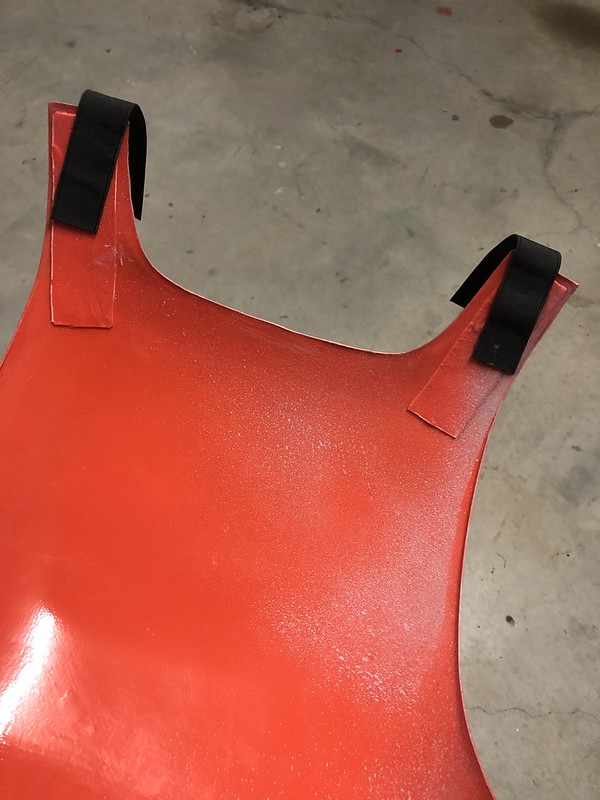
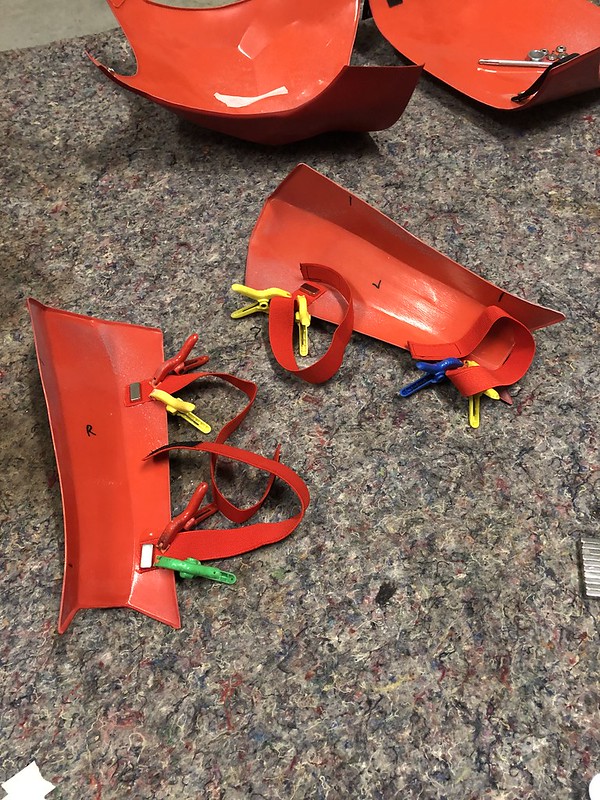
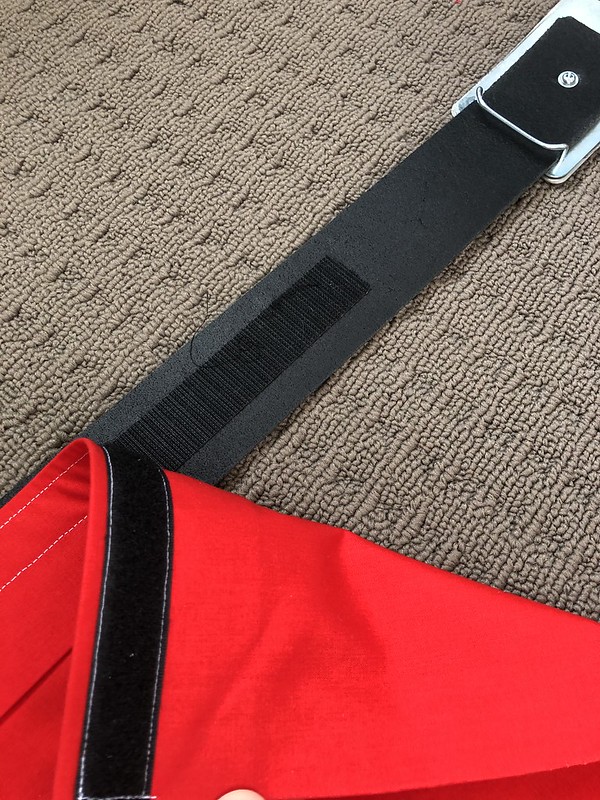
Lots of strapping. A combination of 'hard wired' using E6000, Velcro and Snaps.
 Untitled
 by
Ian Naden, on Flickr
Strips of reinforcing plastic on the shoulders too
 Untitled
 by
Ian Naden, on Flickr
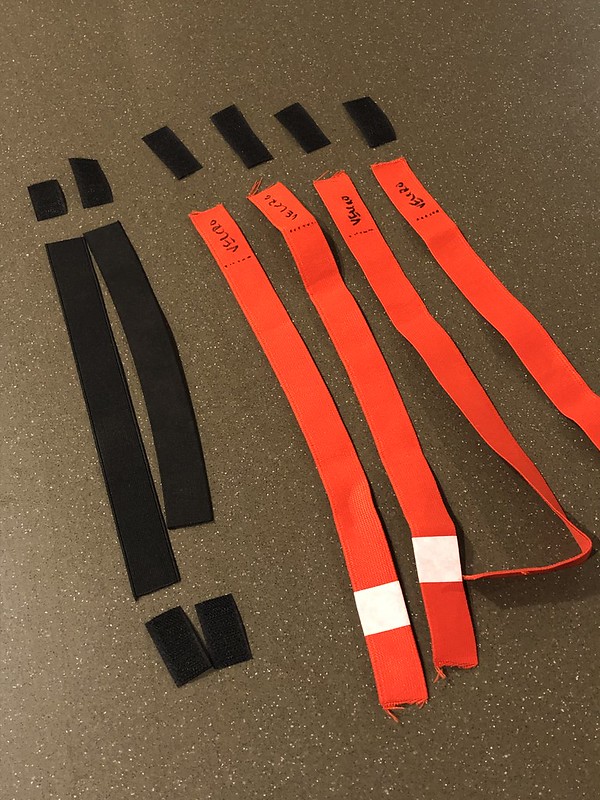
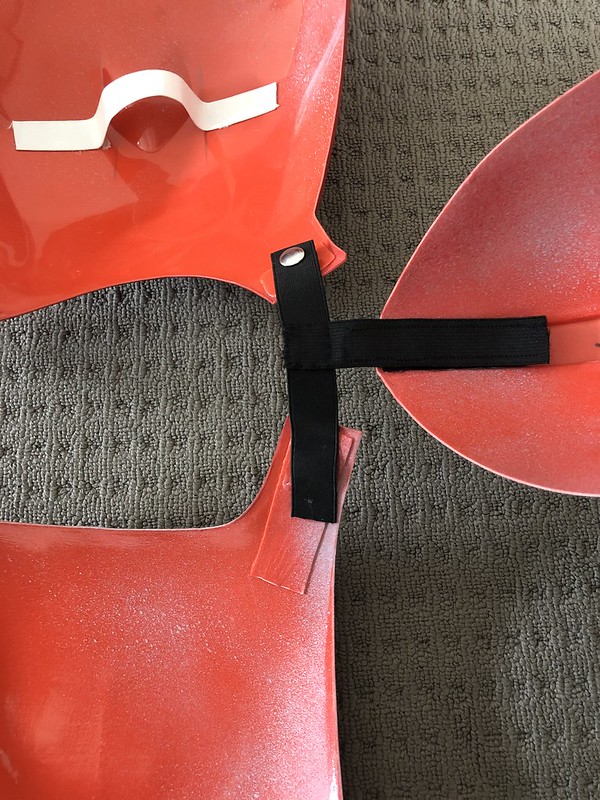
Shin straps and boot straps
 Untitled
 by
Ian Naden, on Flickr
 Untitled
 by
Ian Naden, on Flickr
 Untitled
 by
Ian Naden, on Flickr
Re: TFU Royal Guard from Oz
Posted: Sat Oct 19, 2019 6:20 am
by Crimson8
Hello from Australia!! Or is that G'day...
Your build looks incredible so far. Love the photo progress. Keep this up as its such a helpful thread for those building this specific guard. Cheers mate.
Re: TFU Royal Guard from Oz
Posted: Sun Nov 03, 2019 5:17 am
by Sith Lord
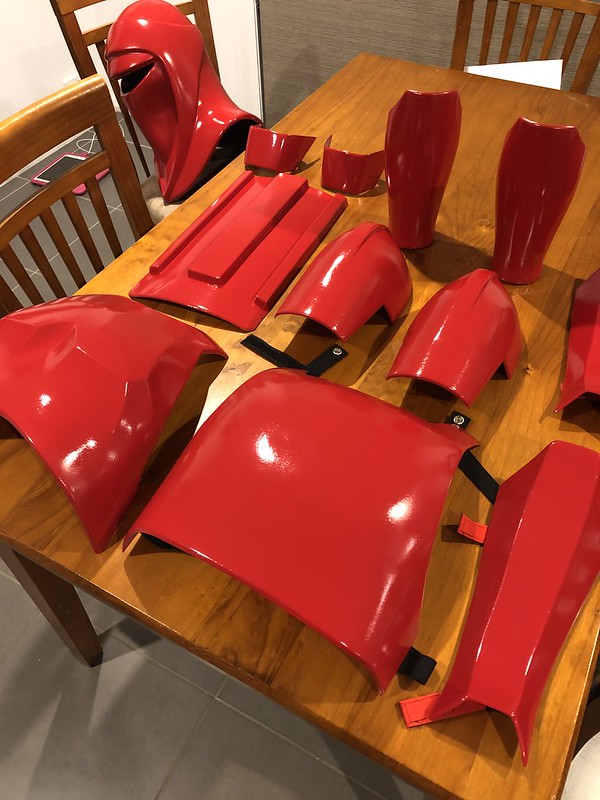
Thanks mate. It's been a quiet (or busy) few weeks... finally got the final coat of colour on today, then the first coat of clear. Now, do I polish/sand in between coats of clear, or just wait till 3 or 4 are on, then polish at the end?
 Untitled
 by
Ian Naden, on Flickr
It does look good when it's still fresh
 https://flic.kr/p/2hEnj1z
 by
Ian Naden, on Flickr
Re: TFU Royal Guard from Oz
Posted: Wed Nov 06, 2019 10:36 pm
by Crimson8
Looks fantastic! A fellow guard i know told me that its best to polish in between coats for that ultra shiny car polish look. If you dont you may get a matte finish but that may not be approvable. Keep working on it and youll be trooping an awesome costume.
Re: TFU Royal Guard from Oz
Posted: Thu Nov 07, 2019 10:59 am
by Sith Lord
Thanks mate. I heard a few different methods. The one I tried was to sand after the last clear coat. It did make it smoother, but heaps and heaps of fine scratches to polish out. Would have taken me a year! Trial piece was one of the boot spats, so I just re-clear coated it and it's back to shiny.
So, no sanding and just polished all the pieces with a 'cream' polish. ie: the finest polish you get.
Final step is to instal the visor and make the kama, then all done I think.
 Untitled
 by
Ian Naden, on Flickr
Re: TFU Royal Guard from Oz
Posted: Mon Nov 11, 2019 1:18 am
by Sith Lord
Visor done. Glued in some styrene blocks and screwed through the visor into these blocks. Makes the visor easily removable if needed.
 Untitled
 by
Ian Naden, on Flickr
 Untitled
 by
Ian Naden, on Flickr
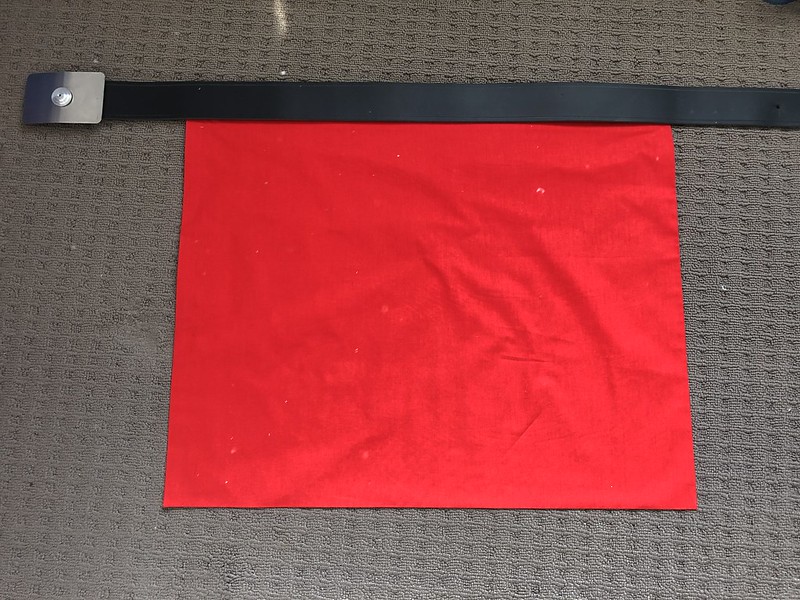
Kama measured and hemmed with iron on hemming tape. Velcro sewed to top of kama, and stuck to inner of belt.
 Untitled
 by
Ian Naden, on Flickr
 Untitled
 by
Ian Naden, on Flickr
To keep the Ab plate aligned, I've glued a piece of elastic to the chest, trimmed down the Ab, so only the thin central section remains. This can then slide up and down to allow me bending over, but will also keep it aligned nicely.
 Untitled
 by
Ian Naden, on Flickr
 Untitled
 by
Ian Naden, on Flickr
 Untitled
 by
Ian Naden, on Flickr
Boots and strapping pics
 Untitled
 by
Ian Naden, on Flickr
 Untitled
 by
Ian Naden, on Flickr
 Untitled
 by
Ian Naden, on Flickr
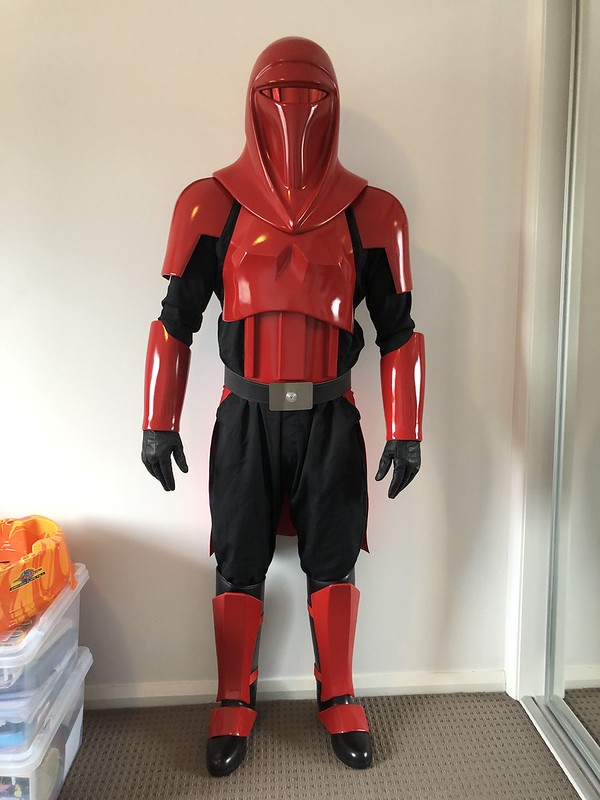
And I think I'm done. Submission pics to be taken this afternoon hopefully, then in the hands of the gods (SP Detachment staff).
Re: TFU Royal Guard from Oz
Posted: Tue Nov 12, 2019 6:36 am
by Sith Lord
And submission pics sent.
 Untitled
 by
Ian Naden, on Flickr
After first kit up, I think I will add some elastic under the shoulder bells (similar to TKs) and secure the belt/buckle a bit better. But apart from that, I think it fits ok.